
Covve Scan integrates with HubSpot to streamline lead capture. Using this integration, captured leads, along with all their details, are transmitted to HubSpot.
The Covve Scan user logins to its HubSpot account via the Covve Scan app in order to enable the integration. As soon as the integration is enabled the user can send captured leads to HubSpot as a Contact. The app maps Covve Scan data to the appropriate HubSpot Contact fields, ensuring seamless CRM integration.
How to enable the HubSpot integration
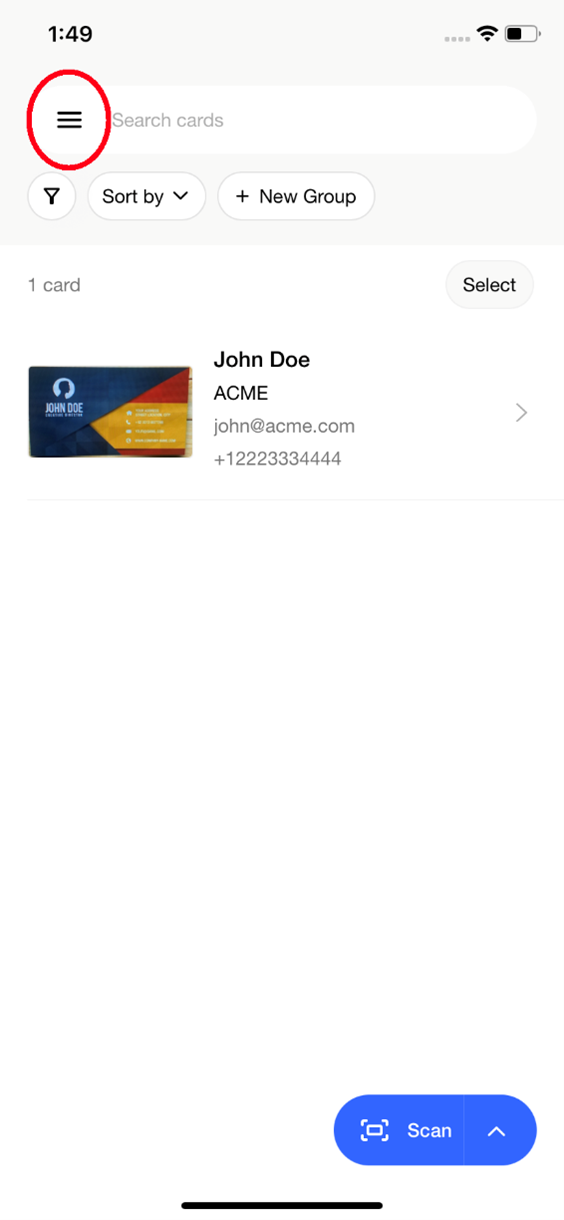
From the Covve Scan main page tap on the burger menu on the top left.
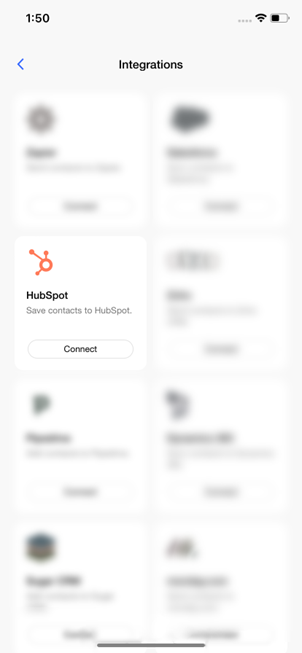
Go to Settings -> Integrations and find the HubSpot one. Tap on Connect.
You will be redirected to a HubSpot website. Login to HubSpot using your HubSpot credentials.

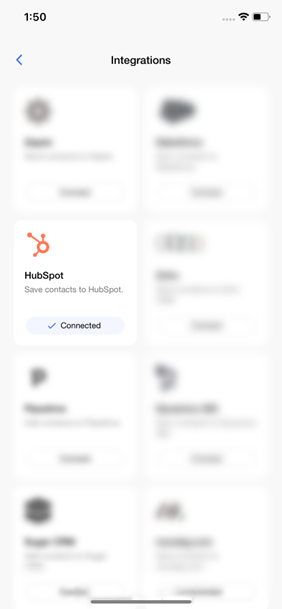
Upon successful login you’ll return in the Covve Scan app and you’ll see that your HubSpot account is connected.
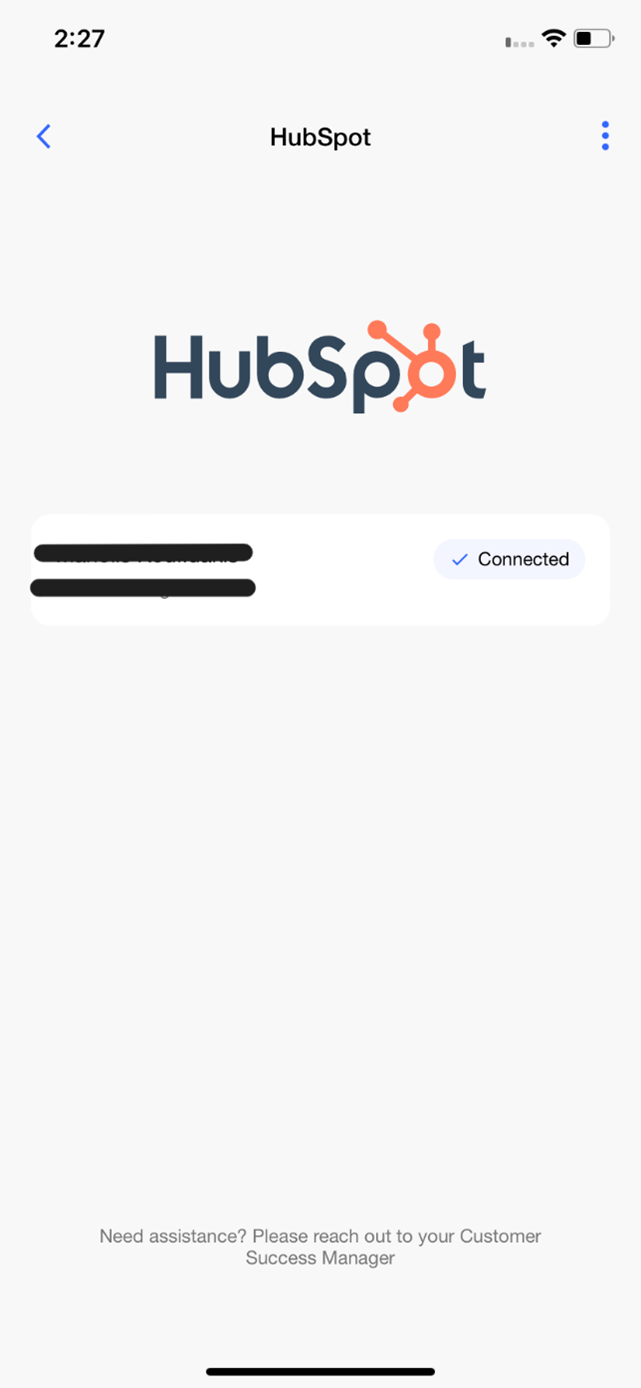
Tap on the HubSpot tile and visit the informational integration page in order to see the logged in user.
The integration is not set and ready to be used.
How to use the HubSpot integration
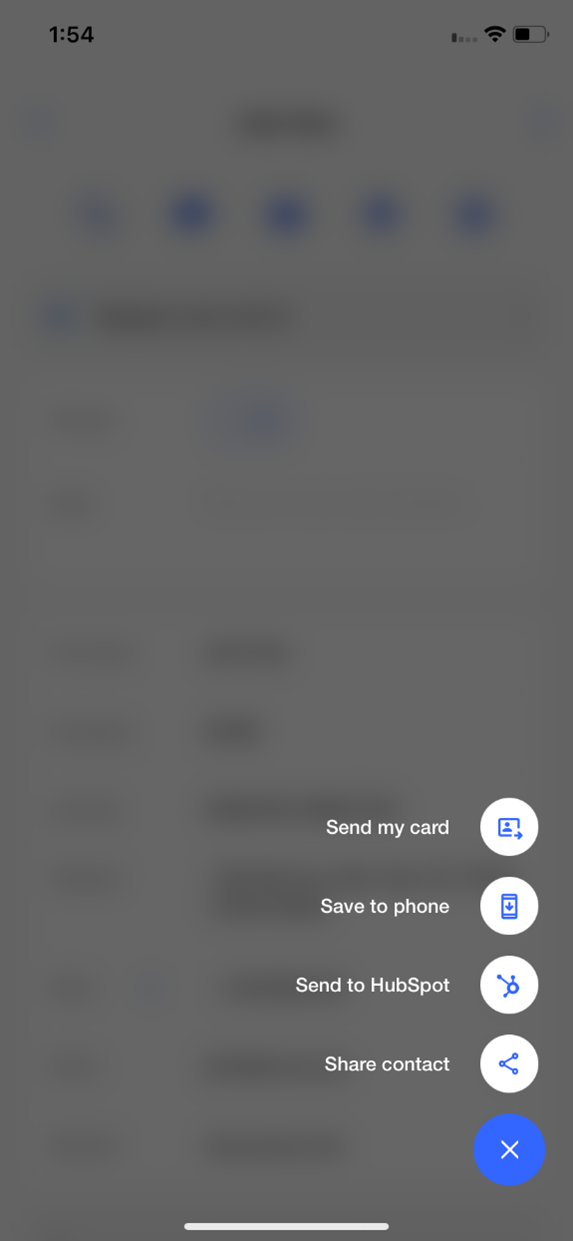
Go to the Covve Scan homepage and scan a business card by taping on the Scan button on the bottom right of the screen. Upon successful scan, tap on the 3-dot menu on the bottom left of the contact.
Tap on “Send to HubSpot”. Upon successful sent, the app will show a green notification at the top.
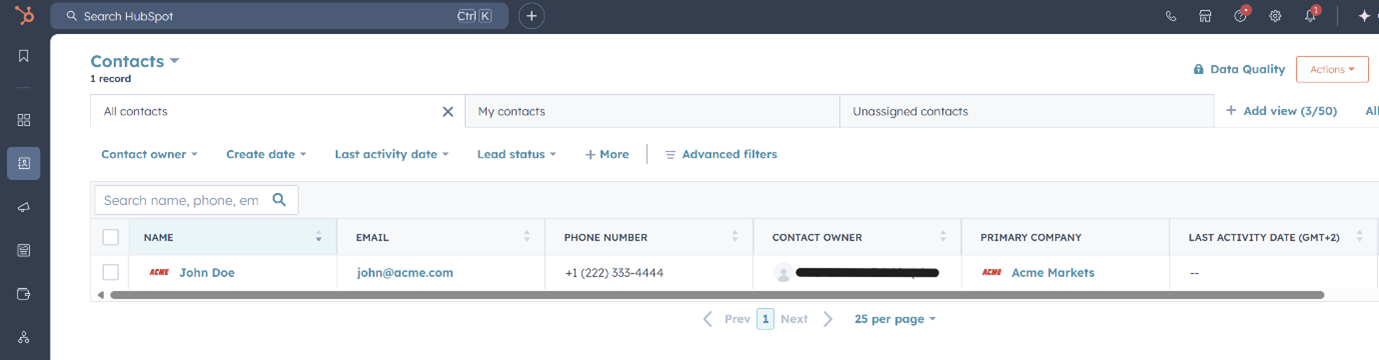
Go to your HubSpot environment and find the exported contact in the Contacts section.
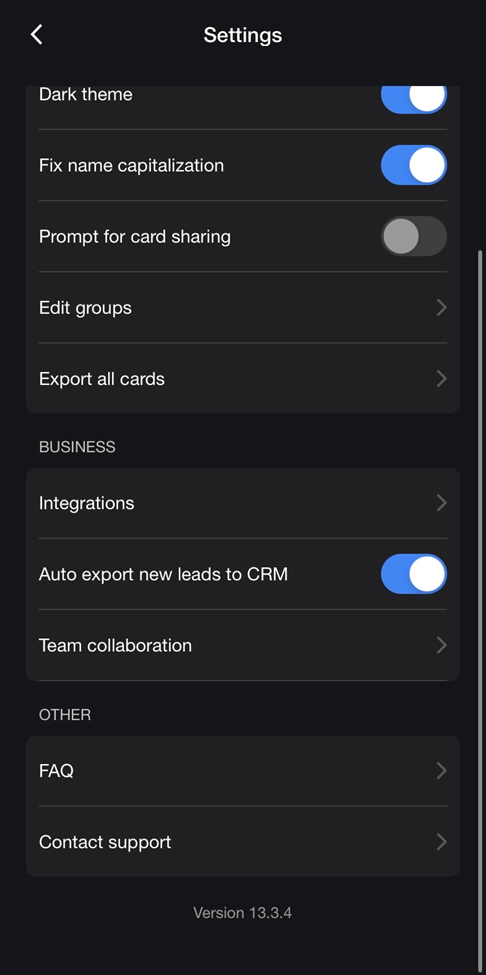
Autosend to CRM
Enable the toggle button “Auto export new leads to CRM”.
Note:
1. You need to be connected to at least one CRM.
2. Existing leads will not be sent automatically to CRM. From the point the user enables the auto-send and onwards, every new lead will be automatically sent.
Duplicate lead/contact in CRM handling
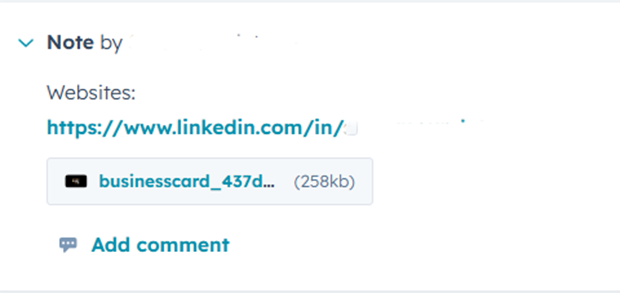
We don’t alter any field on the contact. We compare the old data we have on our system for this contact to the new data the user is trying to insert, and we create a note with all the fields and their values that differ. We send that note to the existing contact on HubSpot and it appears on the contact’s page.
A push notification is also sent to the user that the contact was found and was updated.
Images of leads/contacts on CRMs
Contacts are supported
Once a new contact is successfully created and sent to HubSpot, we create a note that has the card image attached to it.
CRM -> Contacts -> ContactName -> Notes
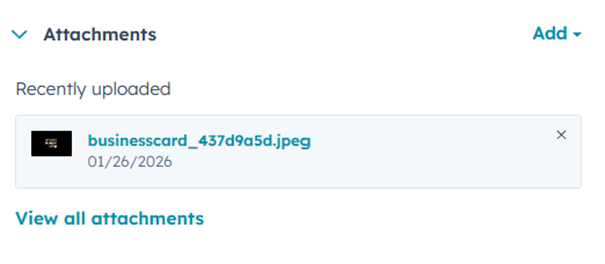
The card image can be accessed from the contact’s Attachments section as well.
CRM -> Contacts -> ContactName -> Attachments
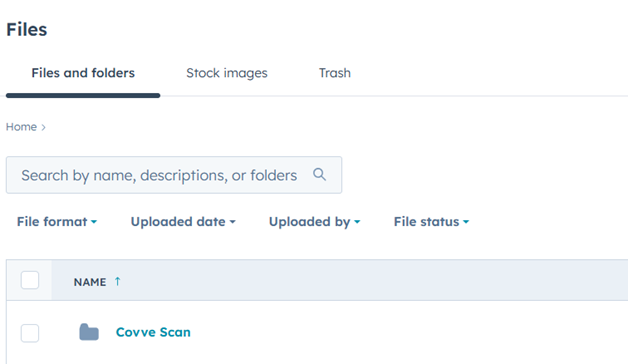
The card image can also be accessed from Content -> Files, where we create once a unique folder for each HubSpot user named “Covve Scan” and that’s where all uploaded business card images are stored.
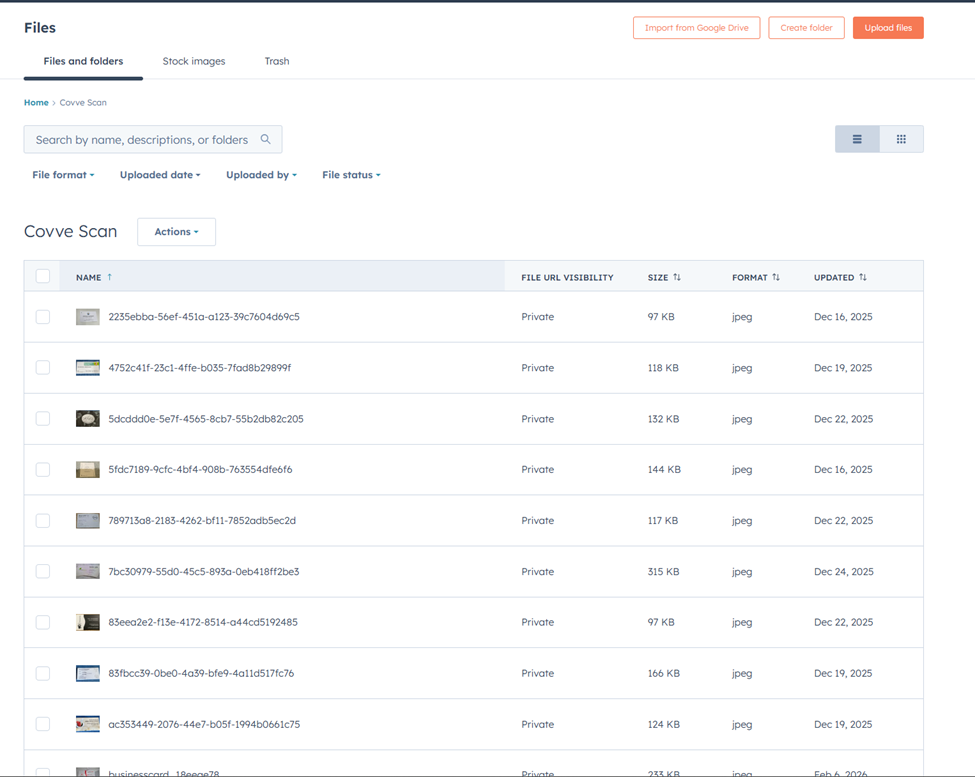
The PRIVATE setting of File Url Visibility means the file is not publicly accessible, requires a signed URL for temporary access, and cannot be indexed by search engines.
Data Transmitted
The mapping of Covve Scan data to HubSpot Contact is the below.
Covve Scan field | HubSpot Contact field |
First part of Full Name | FirstName |
Last part of Full Name | LastName |
Company | Company |
Job Title | Jobtitle |
First Email | |
First Phone | Phone |
Second Phone | MobilePhone |
First Website | Website |
Address.Street | Address |
Address.City | City |
Address.State | State |
Address.PostalCode | Zip |
Address.Country | Country |
The Contact is assigned to the logged-in HubSpot user by setting the hubspot_owner_id field on the Contact.