

Set up a mapping
In the portal, open Custom Fields and find the CRM Mapping section on the same page.
For each custom field, choose the CRM field it should populate, then Save Mappings.
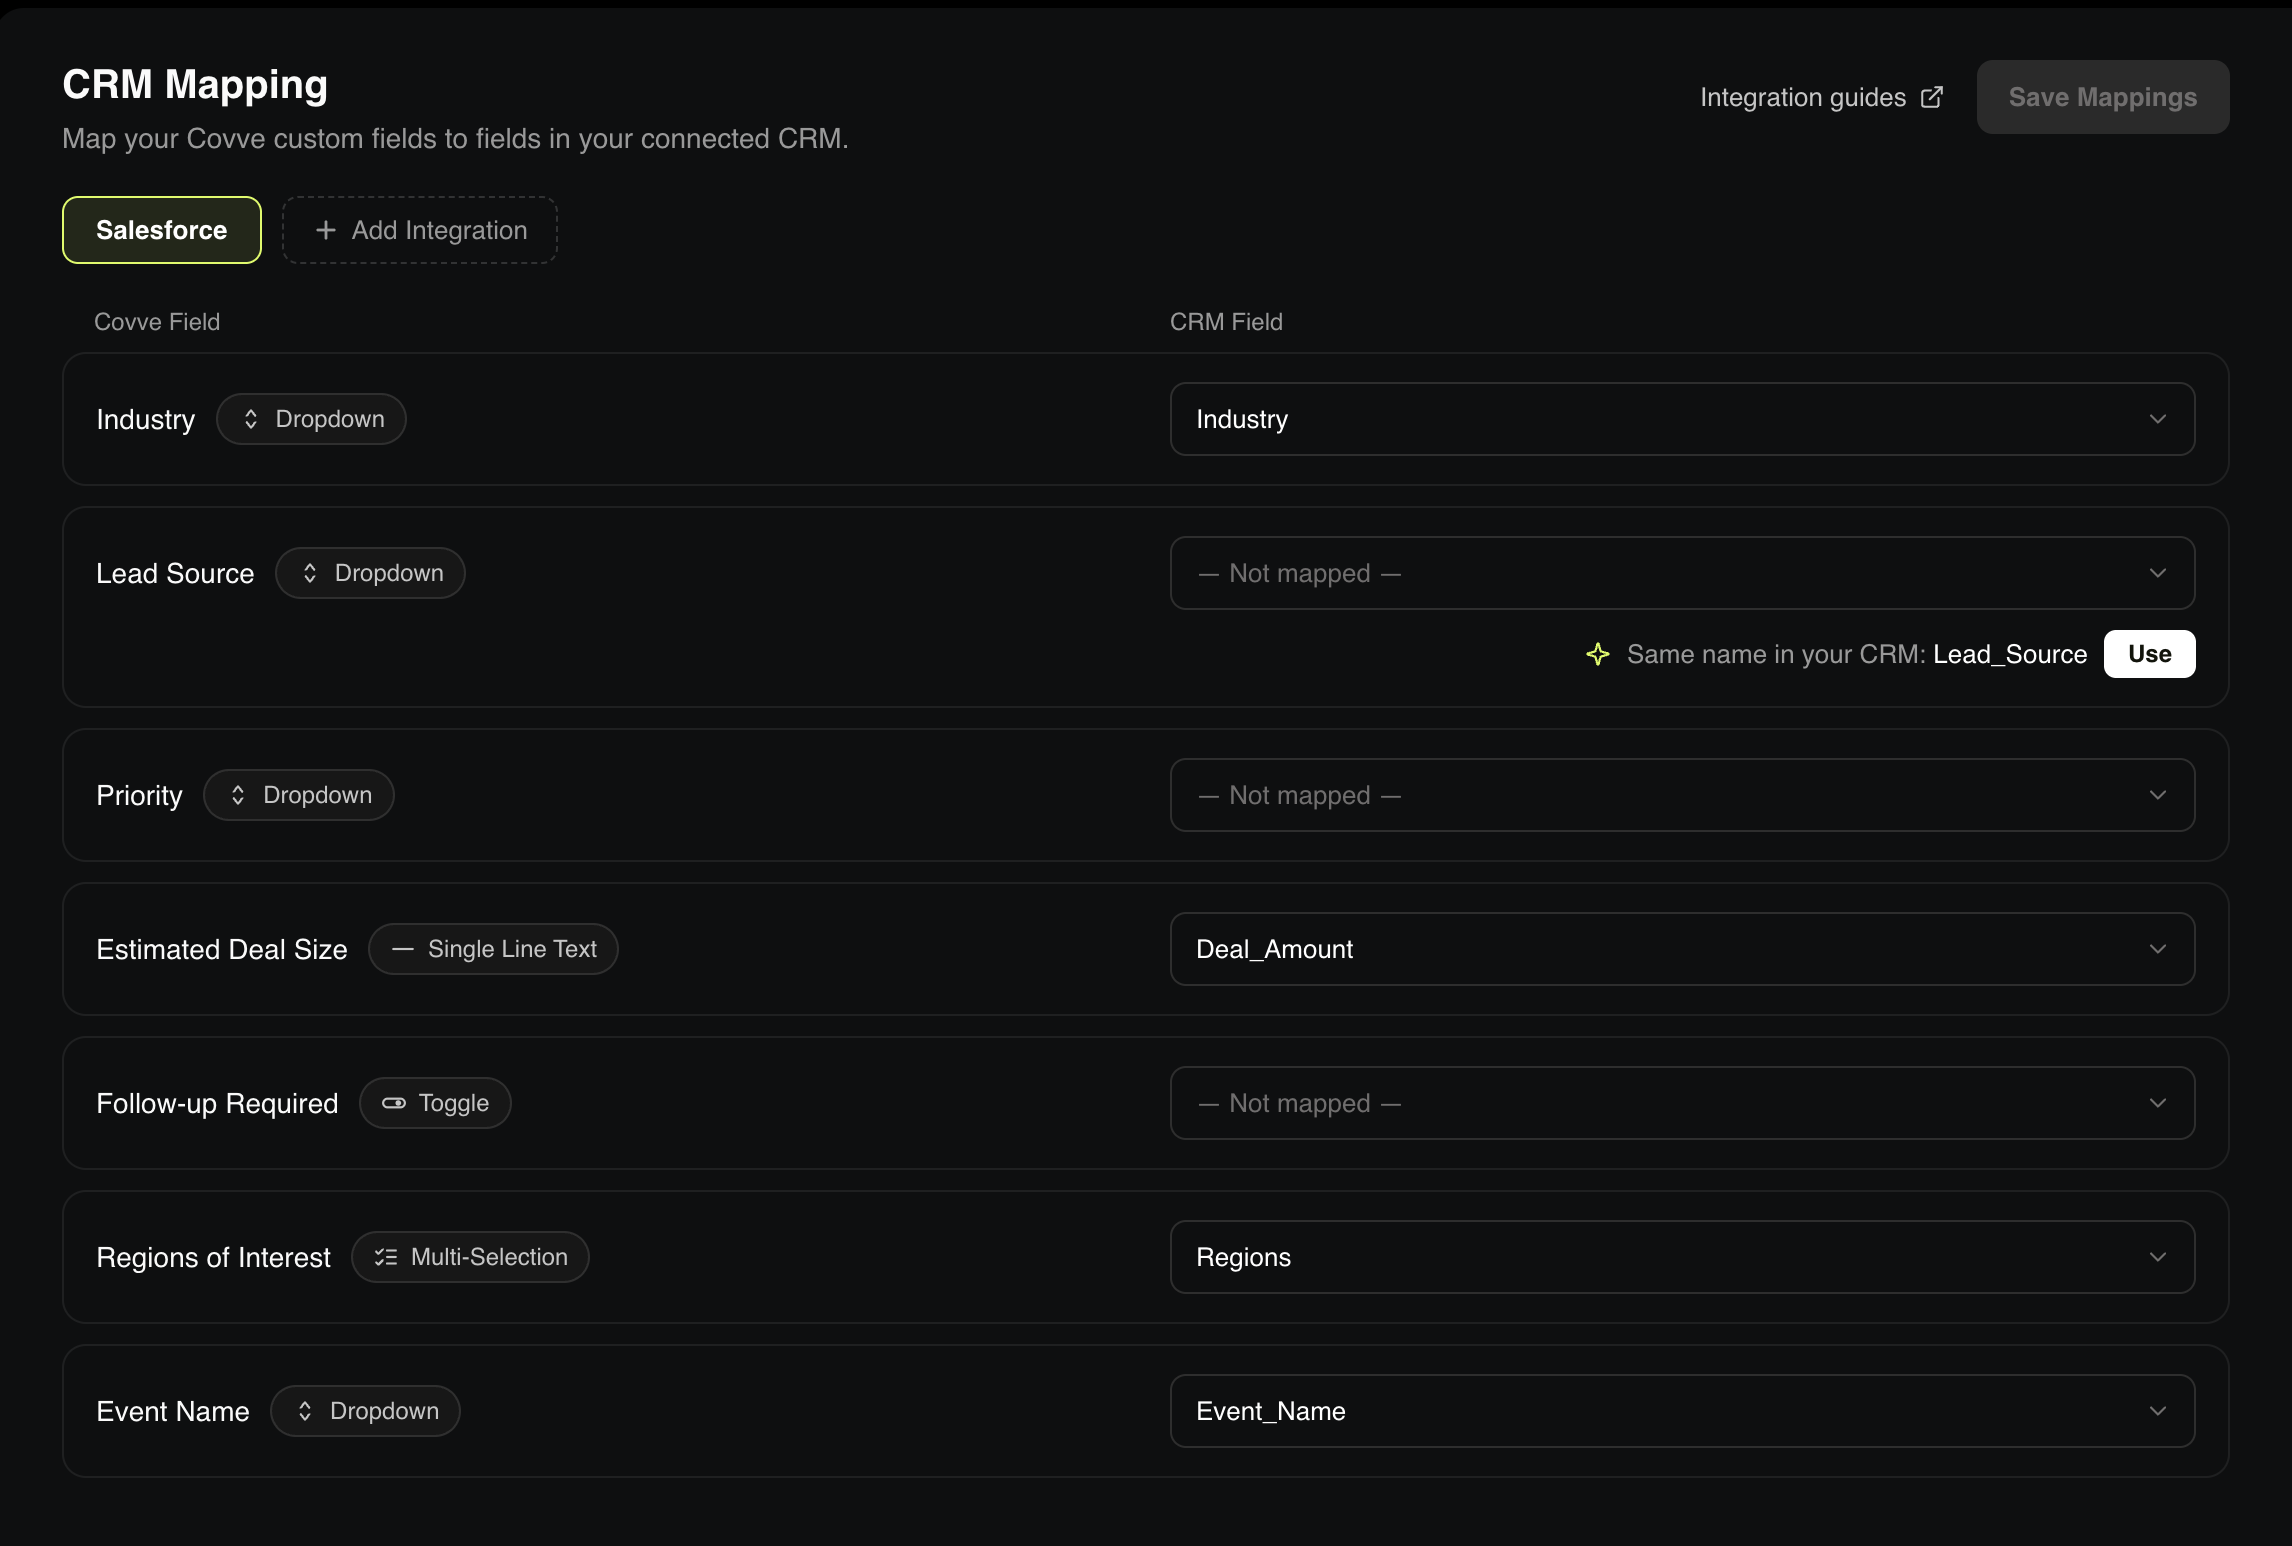
Only an admin can do this. Non-admins see the message An admin can connect a CRM to map fields and sync lead data.
What Covve maps for you
The standard fields, name, company, job title, email, phone, website, address are mapped already. You don't need to do anything for those.
Mapping is only for the custom fields you've defined yourself, since Covve has no way of knowing where "Where we met" belongs in your CRM.
You can see here our integration guides.
Getting it right
Map to a field that already exists in your CRM. If there isn't one, create it in the CRM first
Match the types. A Covve dropdown mapping to a CRM free-text field usually works; the reverse often doesn't, and a mismatch fails quietly rather than loudly.
Same values. Make sure you have the same values in Covve and CRM. Different value will end up not being matched and thus staying empty in CRM.
Test with one lead before an event, not after. Capture a test contact, send it, and look at the record in your CRM. Ten minutes now beats discovering at the end of a conference that four hundred leads have an empty column.
Your existing values are safe
Mapping controls where data goes, not whether it overwrites.
Where a contact already exists, Covve fills empty fields or adds a note rather than replacing values, the exact behaviour depends on the CRM.