
Covve Scan integrates with Salesforce to streamline lead capture. Using this integration, captured leads, along with all their details, are transmitted to Salesforce.
The Covve Scan user logins to its Salesforce account via the Covve Scan app in order to enable the integration. As soon as the integration is enabled the user can send captured leads to Salesforce either as a Contact or Lead. The app maps Covve Scan data to the appropriate Salesforce Contact or Lead fields, ensuring seamless CRM integration.
How to enable Covve Scan integration in your Salesforce Org
Upon setting up your integration, to sends leads from Covve Scan into Salesforce the following action needs to take place:
Customers that have never connected Salesforce with Covve Scan before:
Open this installation link in Salesforce as an Admin: Install the Covve Scan package
Approve the package for your org and follow the wizard
Choose “Install for All Users”
Customers that have already connected Salesforce with Covve Scan:
Covve Scan must be installed in your Salesforce org as a Managed Package - What you need to do:
Log in to Salesforce as an Admin
Go to Setup → Connected Apps OAuth Usage
Find the Covve Scan connected app and click install (on the right side of the line)
This is a security requirement from Salesforce since September 2025.
How to enable the Salesforce integration in Covve Scan
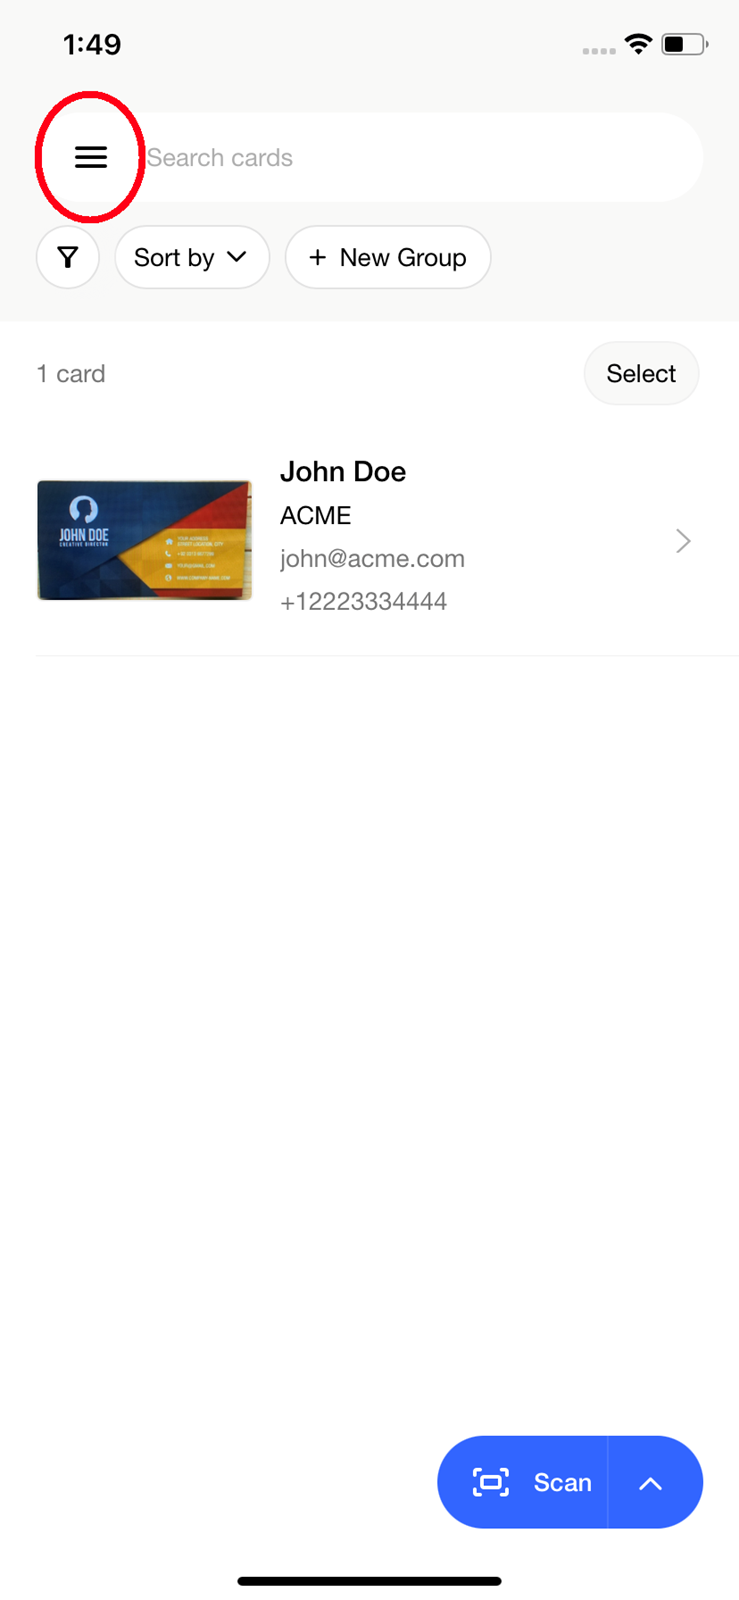
From the Covve Scan main page tap on the burger menu on the top left.
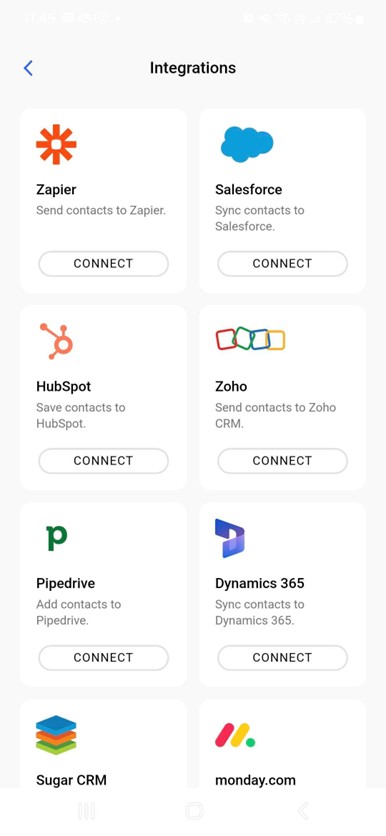
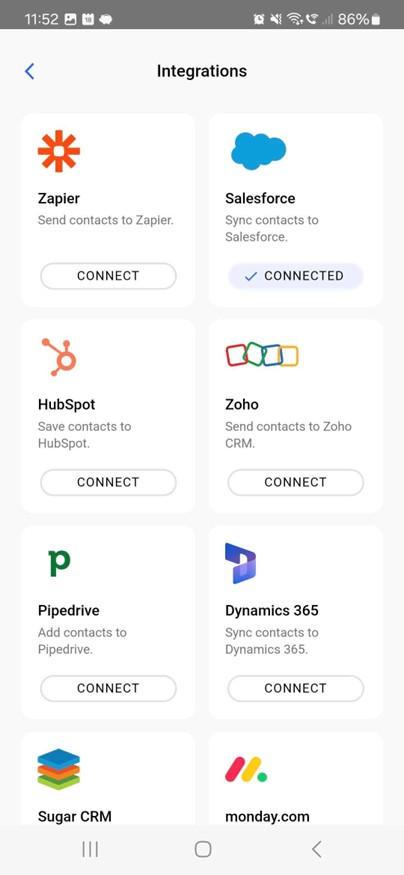
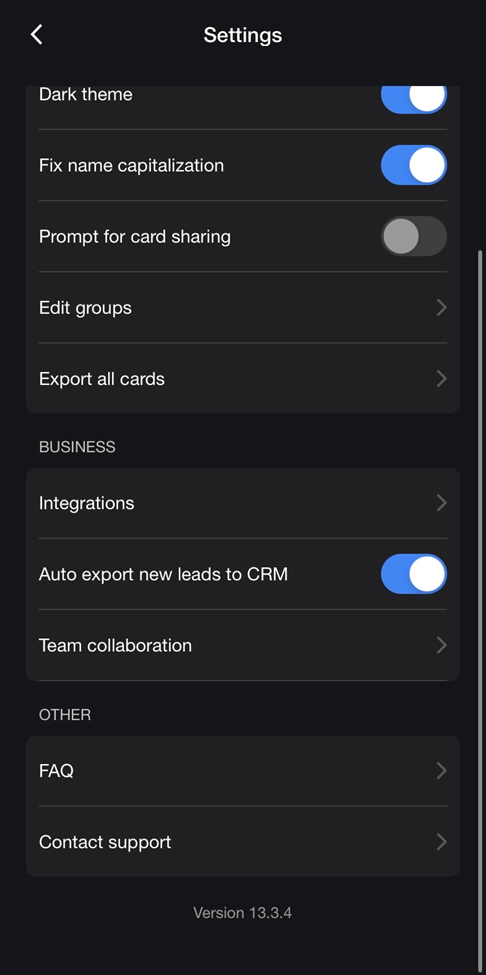
Go to Settings à Integrations and find the Salesforce one. Tap on Connect.
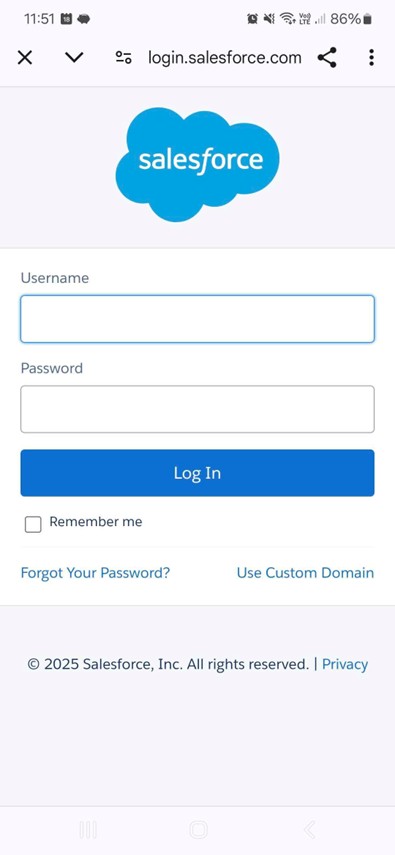
You will be redirected to a Salesforce login website. Login to Salesforce using your Salesforce credentials.
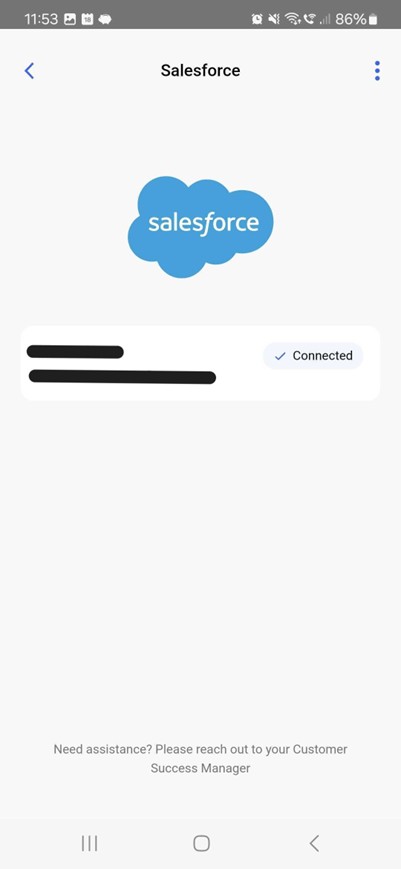
Upon successful login you’ll return in the Covve Scan app and you’ll see that your Salesforce account is connected.

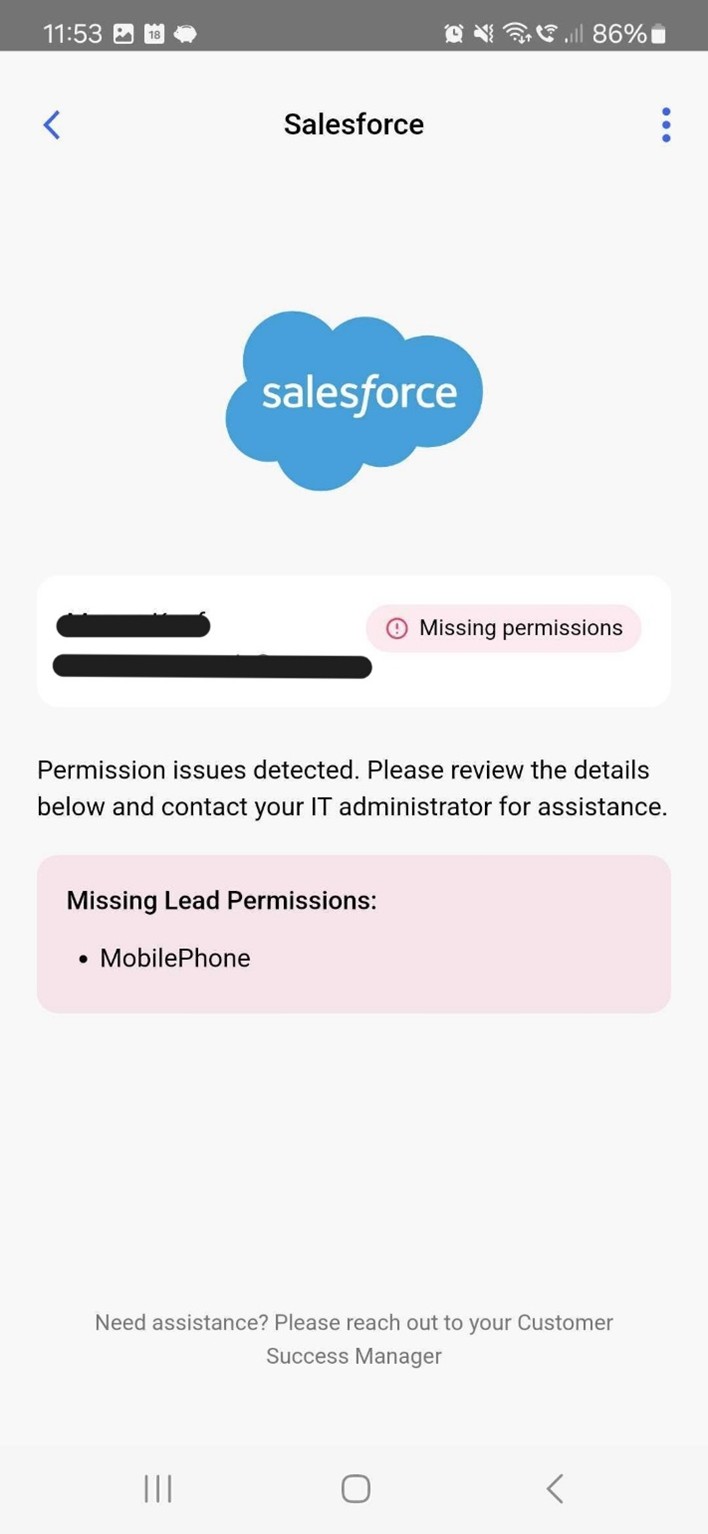
Tap on the Salesforce tile and visit the informational integration page in order to see the logged in user.
The integration is now set and ready to be used.
Missing Permissions
Each user within Salesforce is assigned a specific permission set governing access to the Leads and Contacts entities. To successfully export a captured lead as either a Lead or a Contact, the user must possess a minimum required permission set within Salesforce, as determined by the Salesforce administrator.
If the necessary permissions are not granted, Covve Scan will display a notification screen, as illustrated below, informing the user of the required permissions that must be enabled within Salesforce to ensure seamless integration. Failure to grant the appropriate permissions may result in limitations in the data transmitted from Covve Scan to Salesforce.
How to use the Salesforce integration
Go to the Covve Scan homepage and scan a business card by taping on the Scan button on the bottom right of the screen. Upon successful scan, tap on the 3-dot menu on the bottom left of the contact. Tap on “Send to Salesforce”.

Select whether to export the captured lead as Lead or Contact via the relevant screen.
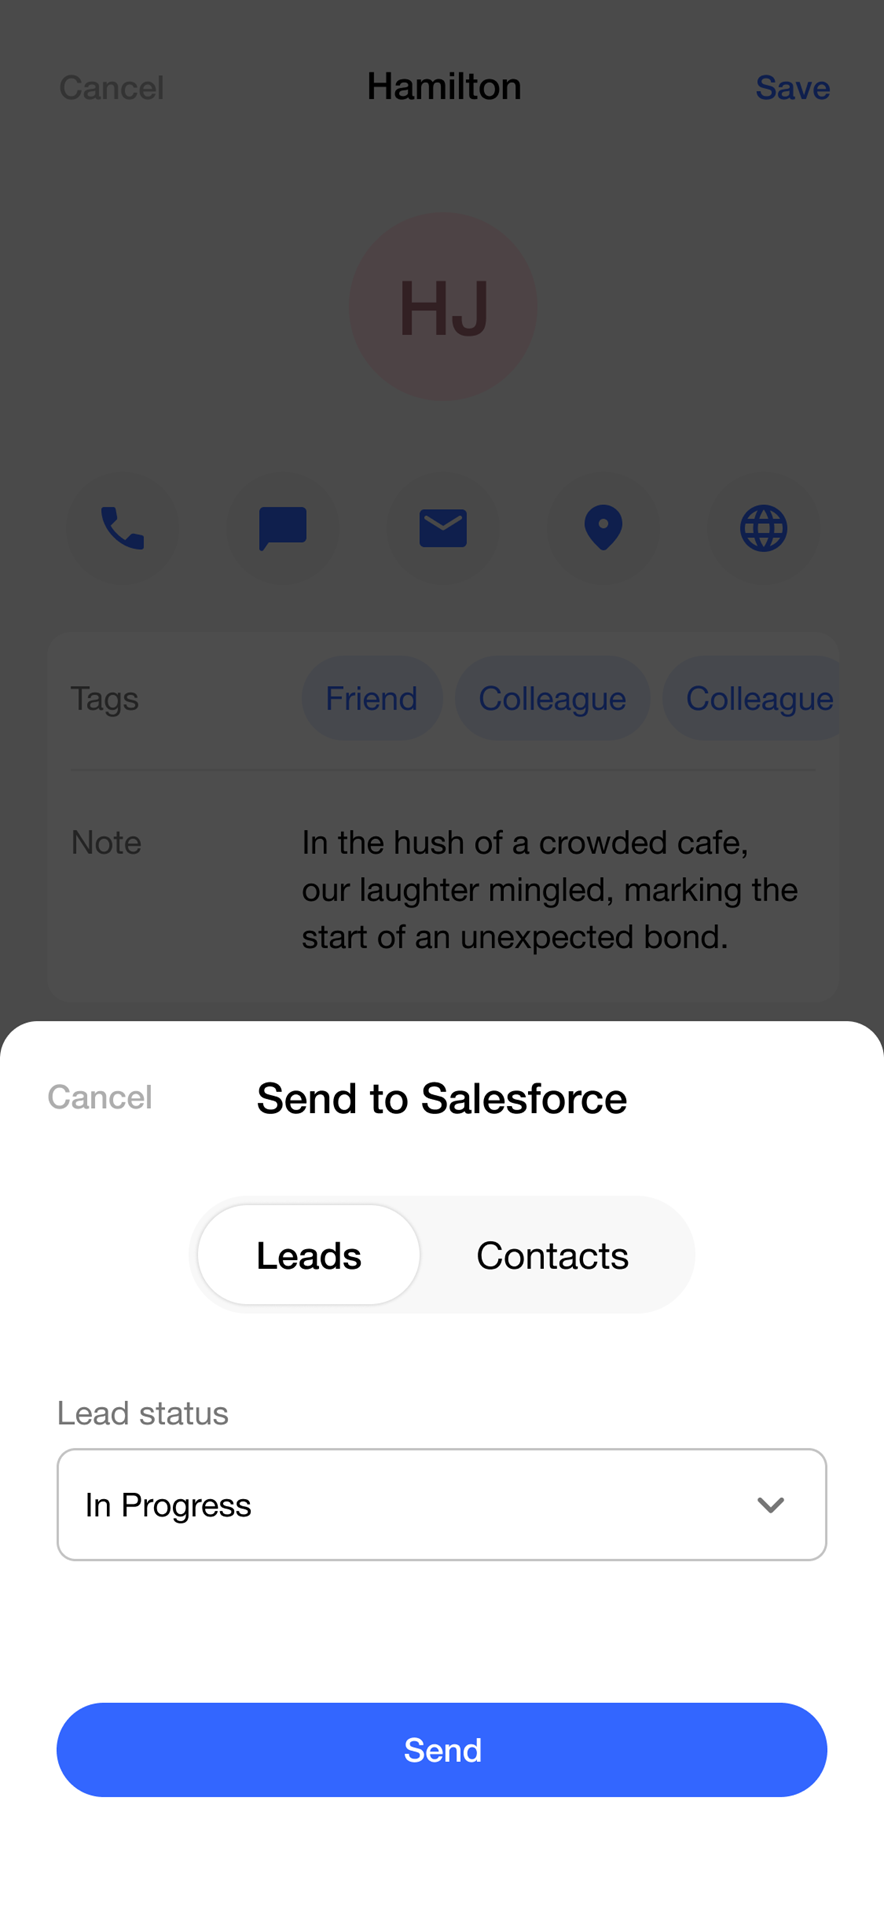
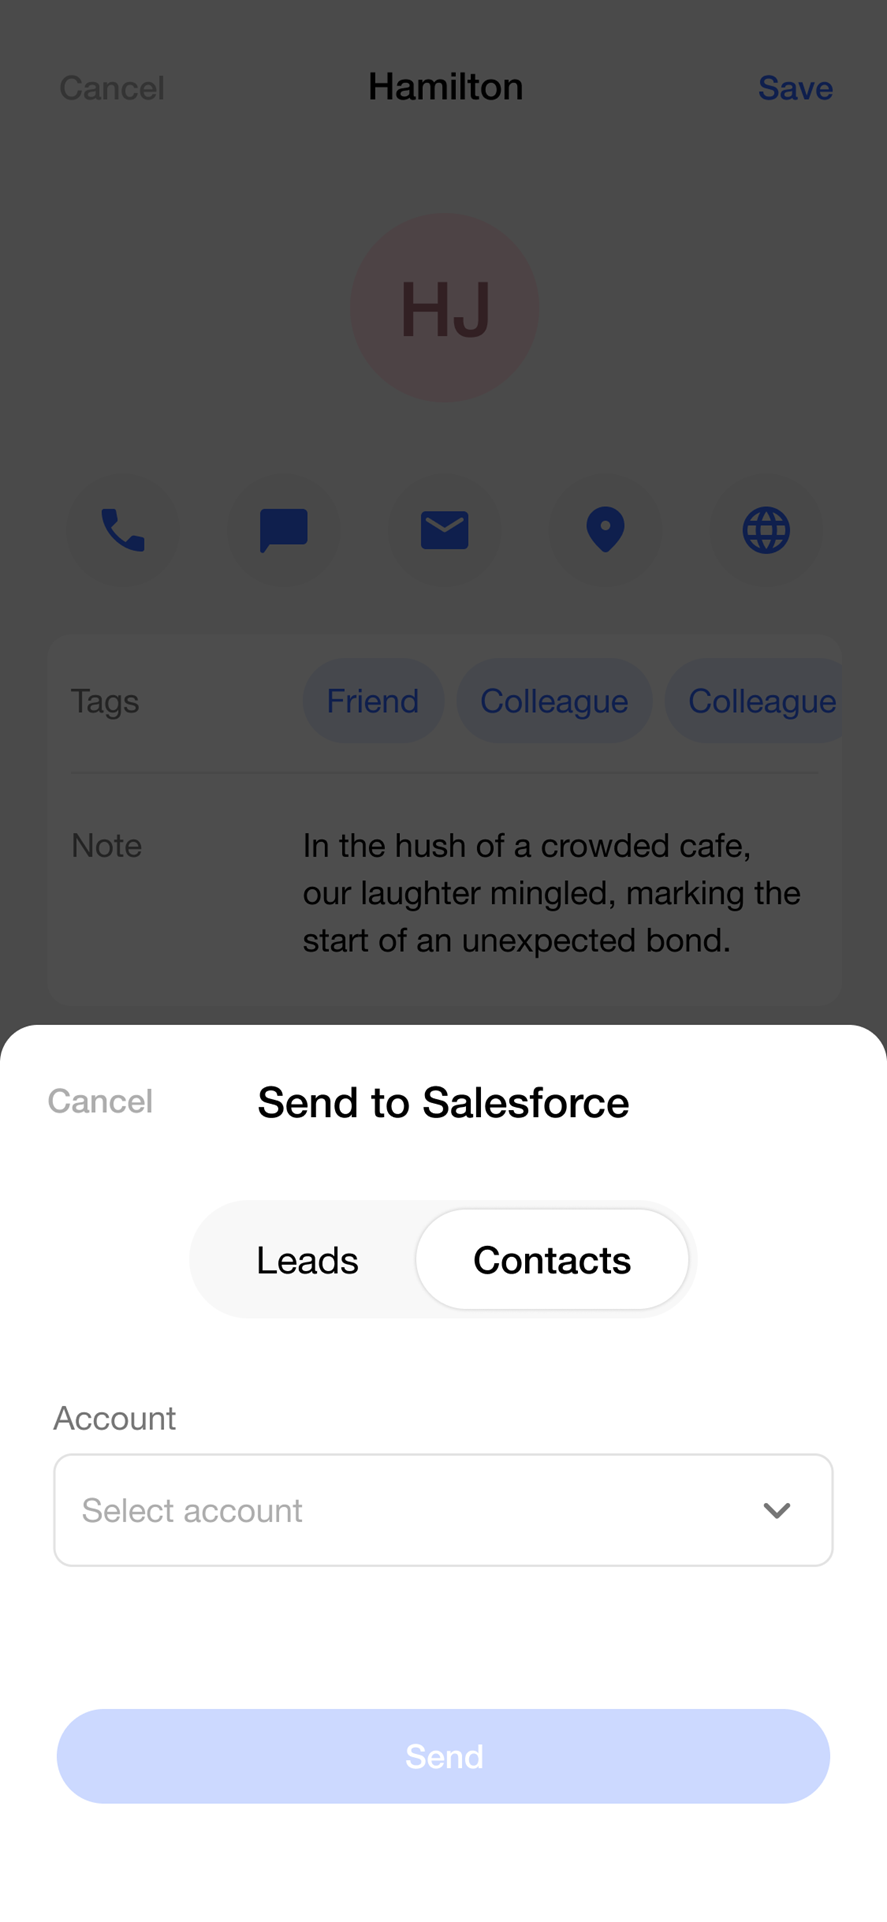
The Lead Status and Account fields are populated with data from the connected Salesforce account based on the Salesforce company’s setup.
When ready, tap “Send” in order to send the data to Salesforce. If the data is sent successfully, you’ll get a confirmation message. If there are some errors in the communication with Salesforce, you’ll receive the error that Salesforce reported.
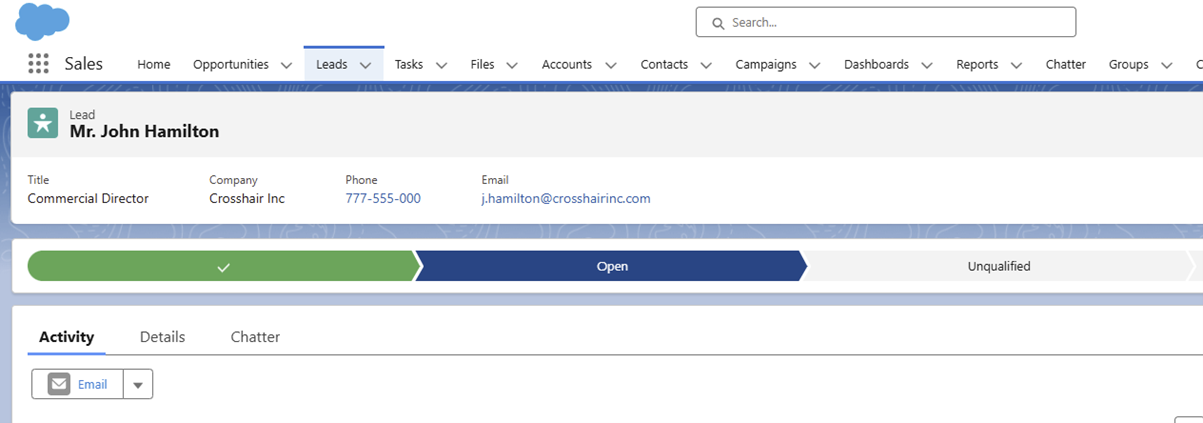
In case of successful sending the data to Salesforce, go to your Salesforce environment in Leads or Contacts and find your newly created entry.
Autosend to CRM
Enable the toggle button “Auto export new leads to CRM”.
Note:
1. You need to be connected to at least one CRM.
2. Existing leads will not be sent automatically to CRM. From the point the user enables the auto-send and onwards, every new lead will be automatically sent.
Duplicate lead/contact in CRM handling
We get the existing lead from Salesforce and we fill in only the fields that are empty. Also, we create a note with all the new lead data we have, so the user can see the whole snapshot of data at the given time of the update, and we send it to Salesforce. On the Salesforce platform the note appears on the Files tab, but customer’s Salesforce admin can make arrangements, so the note appears on the lead tab.
A push notification is also sent to the user that the contact was found and was updated.
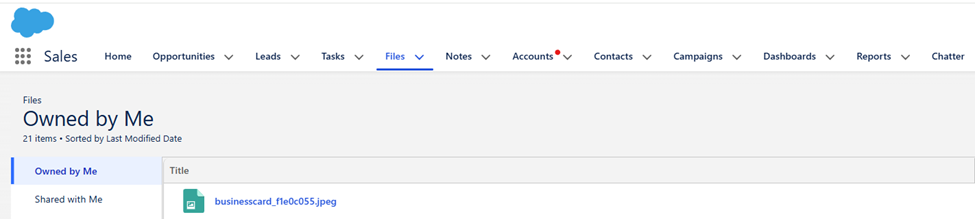
Images of leads/contacts on CRMs
Only the front of the business card is sent.
Name of image file on CRMs: businesscard_[card id]
File format: jpeg
After a new lead/contact is successfully created and sent to SF, we create a new file for the image, and we send it to SF. It is in Files tab but as mentioned in the “Duplicate lead handling section” above, and it can be visible on the lead/contact tab.
Data Transmitted
The mapping of Covve Scan data to Salesforce Lead is the below.
Covve Scan field | Salesforce Lead field |
First part of Full Name | FirstName |
Last part of Full Name | LastName |
Company | Company |
Job Title | Title |
First Email | |
First Phone | Phone |
Second Phone | MobilePhone |
Notes | Description |
Address | Address Street |
Address.City | City |
Address.State | State |
Address.PostalCode | PostalCode |
Address.Country | Country |
Lead Status (from wizard) | Status |
The mapping of Covve Scan data to Salesforce Contact is the below.
Covve Scan field | Salesforce Contact field |
First part of Full Name | FirstName |
Last part of Full Name | LastName |
Company | Company |
Job Title | Title |
First Email | |
First Phone | Phone |
Second Phone | MobilePhone |
Notes | Description |
Address | MailingStreet |
Address.City | MailingCity |
Address.State | MailingState |
Address.PostalCode | MailingPostalCode |
Address.Country | MailingCountry |
Account (from wizard) | AccountId |